During a point count, an observer stands at a single location for a predetermined period of time, recording all birds they see or hear. Point counts are used by projects like:
- Breeding bird atlases
- Ontario Forest Bird Monitoring Program
- American Woodcock Singing Ground Survey
Note that some projects conduct point counts using the checklist tool, essentially doing a stationary checklist survey for a fixed period of time. Most projects, though, are now using the app’s map-based point count tool, which this page covers.
This video will walk you through the process of collecting data using the point count protocol. Below the video, you’ll find step-by-step instructions with screenshots.
NatureCounts Point Count Protocol Walkthrough:
Point Count Basics:
To begin your point count, navigate to the Create tab in the app and select your location, then tap “Next”.
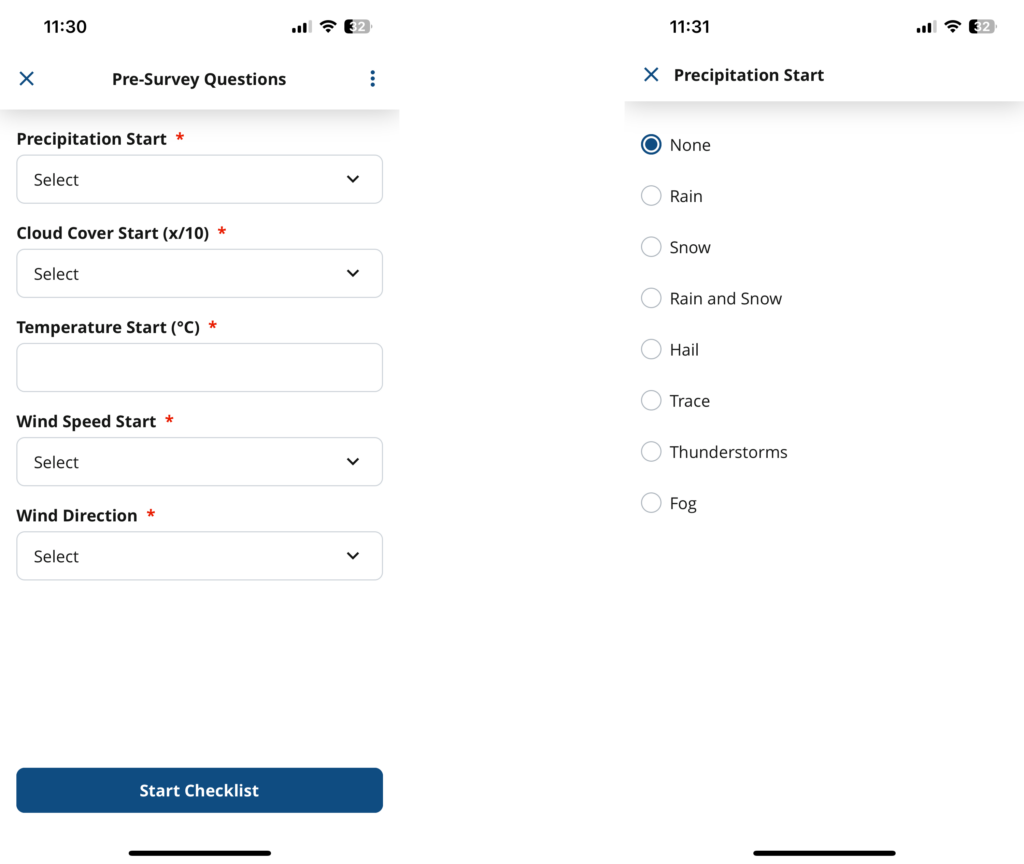
For some projects, you will need to answer some pre-survey questions. These are different for every project, and appear as a series of text boxes and dropdown menus. Red asterisks indicate fields that are required. Simply tap each box or menu, then enter or select the appropriate response. Tap “Start Checklist”.
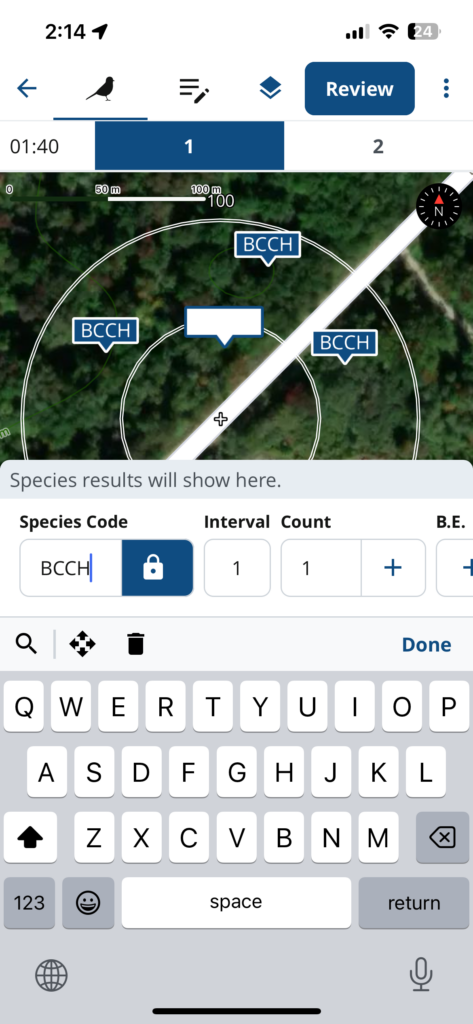
The point count screen displays a map of your current location. On it, in most projects, you will see distance bands – concentric circles that indicate certain distances (in metres) from the observer. The number and distances of these bands varies by project.
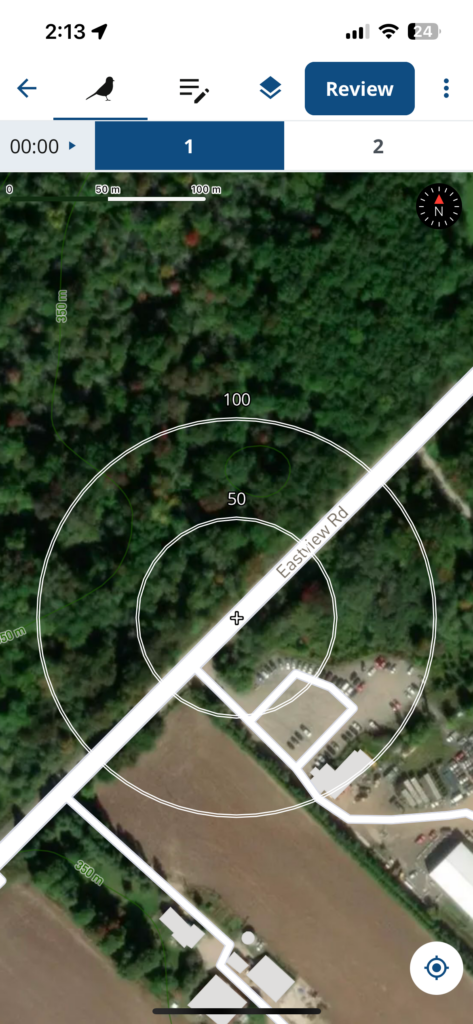
At the top you will see a timer, and you may also see numbered boxes which indicate different time intervals. The duration and intervals also vary by project. For example, the Ontario Breeding Bird Atlas uses a five minute duration divided into two intervals: minutes 1-3, and minutes 4-5.
This may seem a lot to think about, but fortunately the app does much of the heavy lifting for you. When you are ready to start your point count, tap the timer. To enter an observation, tap the map wherever you saw or heard a bird. A marker will be created in that location, and a box will appear for you to enter some information.
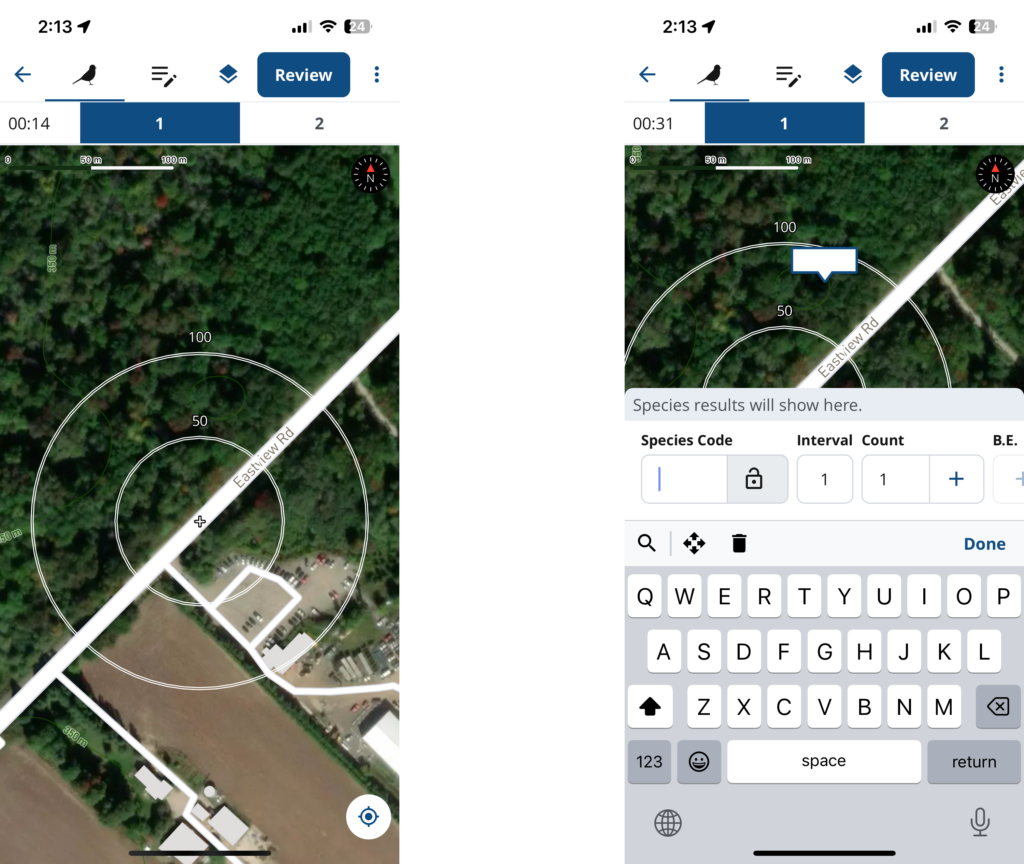
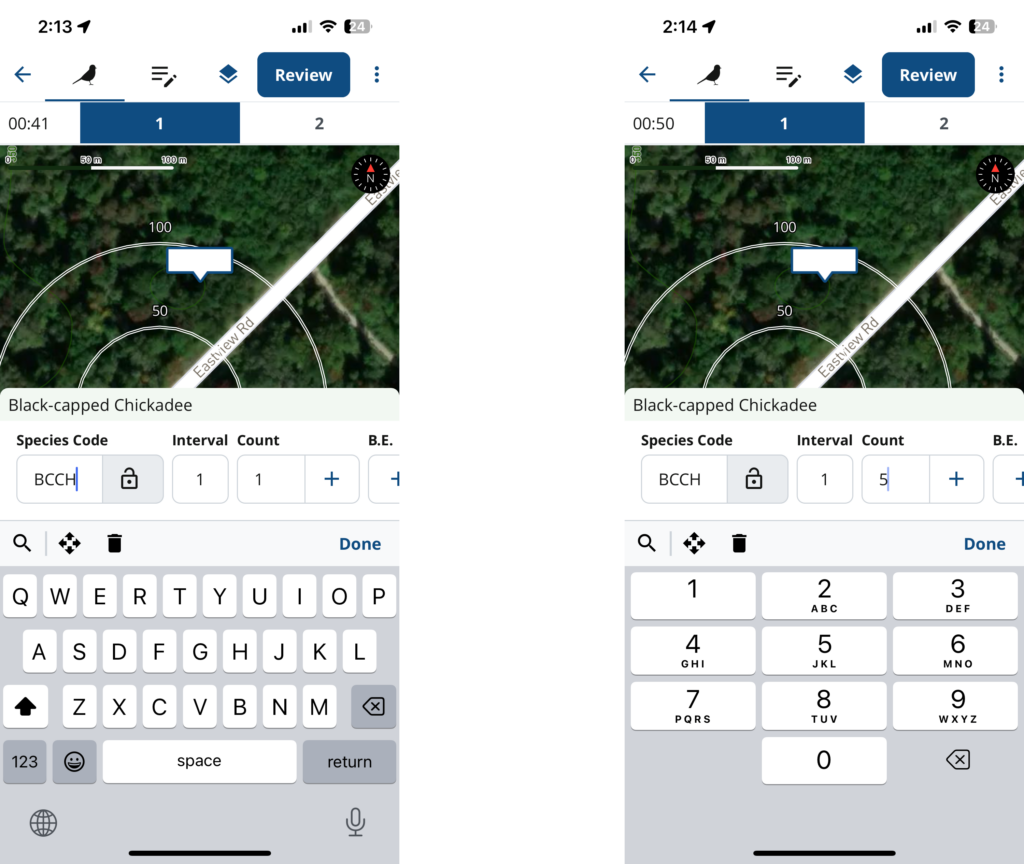
Enter the species using its four-letter code. If you don’t know the code, you can look it up by tapping the magnifying glass icon above the keyboard. The interval in which you observed the species will be automatically entered, but you can change it by tapping it if needed. The count (number of individuals) will be one by default, but you can add more by tapping the “+” symbol. To enter a larger number, tap the number in the box and a keypad will appear.
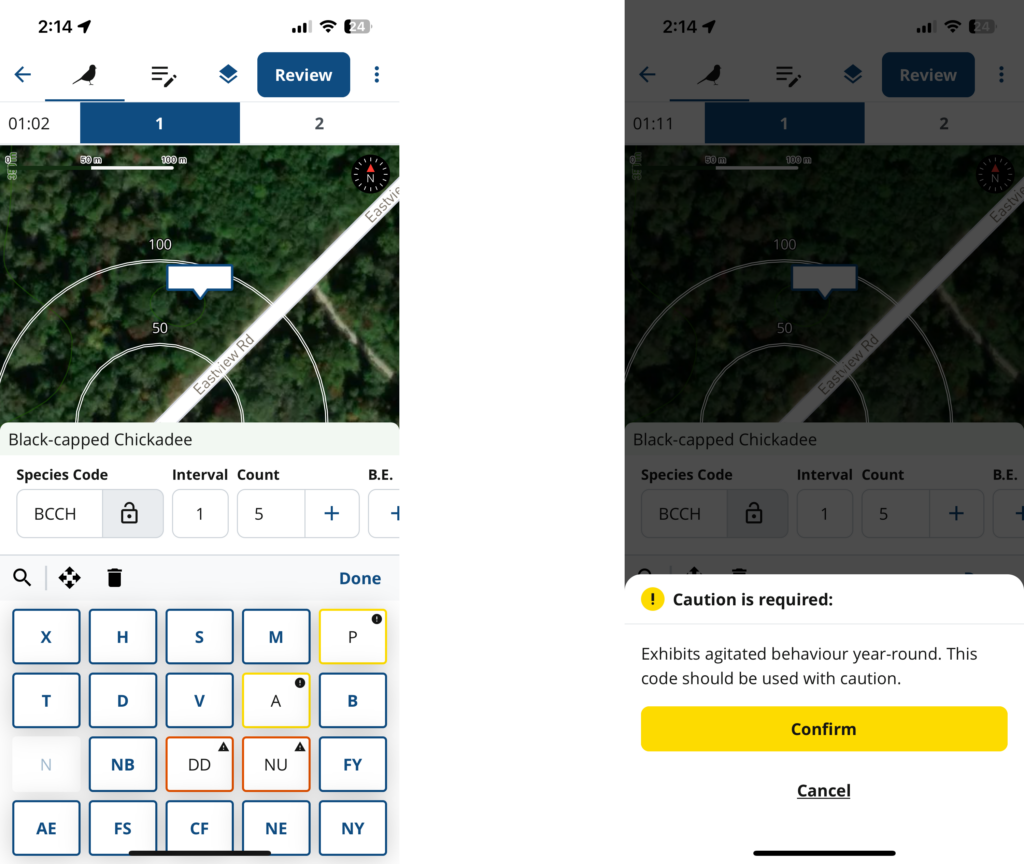
To enter breeding evidence, tap the “+” symbol under B.E. You will see a grid with all the available breeding codes. Yellow boxes indicate when a code should be used with caution for a given species, and red boxes indicate when a code is not likely applicable. Tap the desired code, and when you are satisfied with your observation, tap “Done”. Codes which may not be used for the species are greyed out.
To finish placing your pin, tap “Done” above the keyboard.
You can edit, move, or delete a marker at any time. Simply tap the marker to re-open it. To move it, tap the arrows icon under the species code, then tap the new location on the map, then “Done”. To delete a marker, tap the trash can icon.
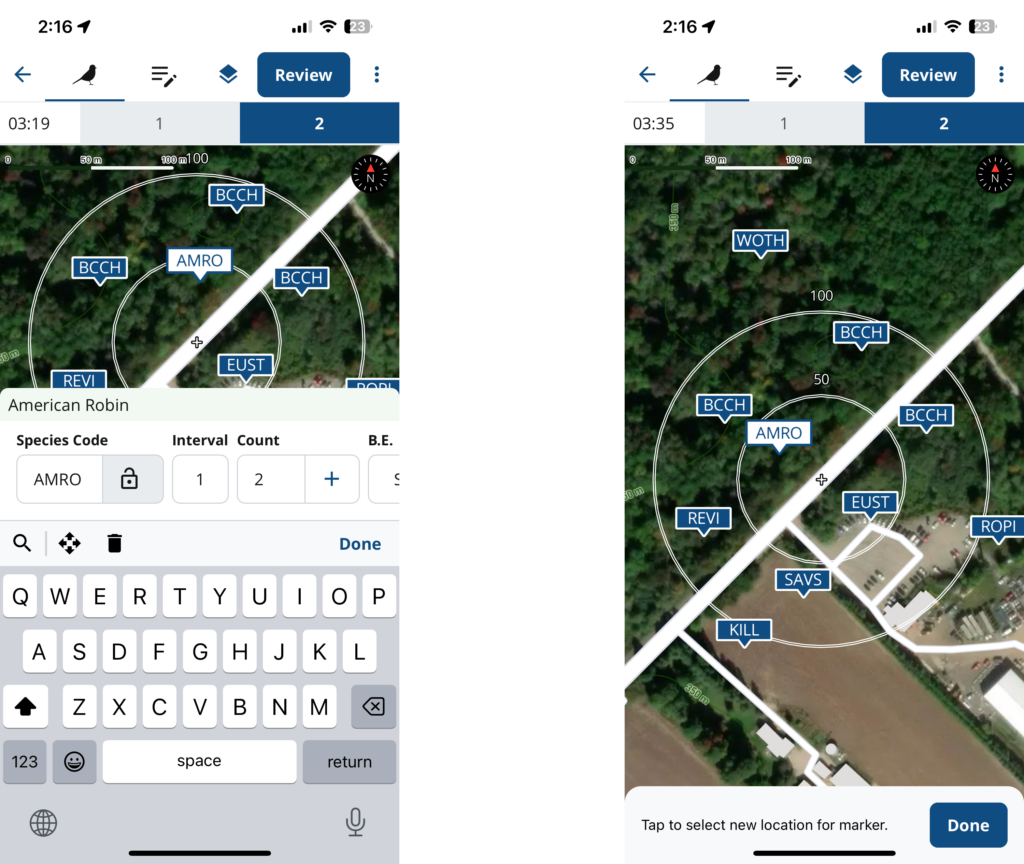
If you observe several individuals of the same species at different locations, you can enter them quickly by using the lock icon beside the species code. When you tap the lock icon, every new observation will automatically use the same species code. When you wish to enter a different species, just tap the icon again to disable it.
When you are done your point count, tap “Review”. Some protocols include post-survey questions, which take the same format as the pre-survey questions. You will then be able to review your checklist. On the Checklist Review screen, confirm the date and time. Enter the number of observers, and indicate whether you are submitting a complete checklist.
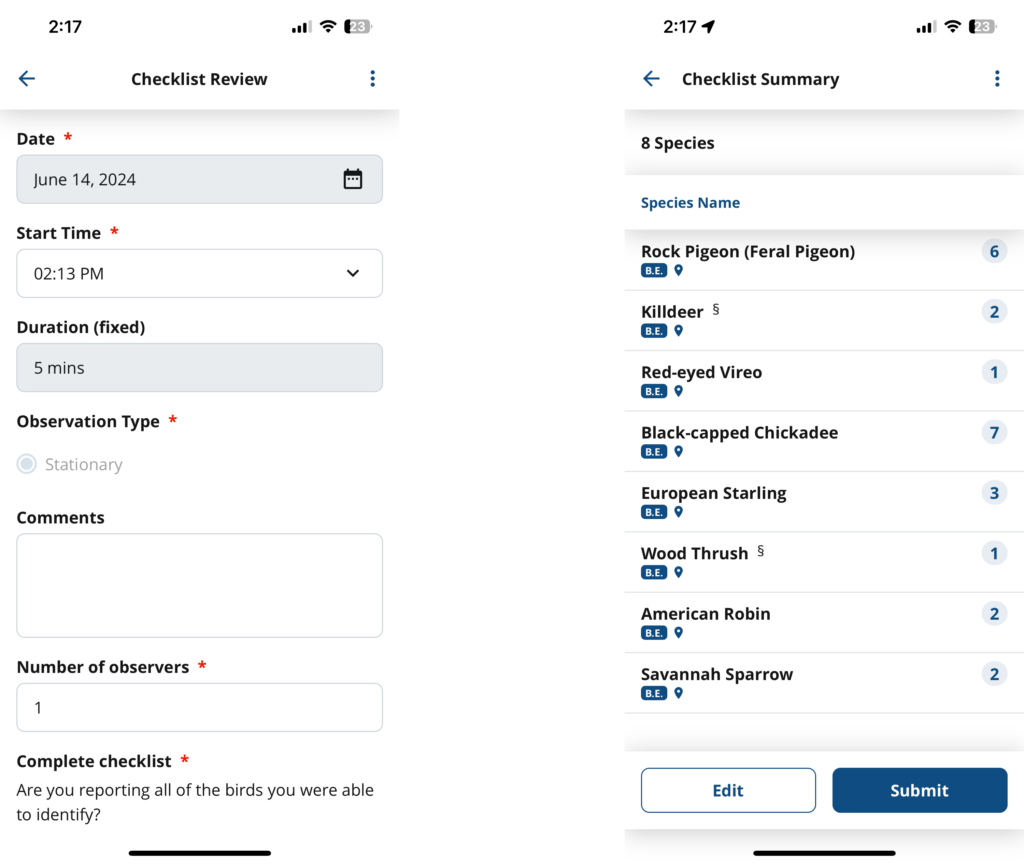
On the Checklist Summary screen, you may review the list of birds you observed. To return to the point count screen to edit your data, tap “Edit” at the bottom.
When you are satisfied, tap “Submit” to submit your point count.
Remember that the exact details of your point count will depend on the project in which you are participating, so don’t forget to check your project’s protocols and resources, and connect with your project coordinator if you have any questions!
Next section: Individual Surveys