During a checklist survey, an observer walks through an area and notes all birds they see or hear on a checklist. They may also record breeding evidence or other information. Checklist surveys are used by projects like:
- Breeding bird atlases
- MarshWatch
- Christmas Bird Count for Kids
- Long Point Bird Observatory
- Swifts and Swallows
- Program for Regional and International Shorebird Monitoring (PRISM)
- British Columbia Coastal Waterbird Survey
These videos will walk you through the process of collecting data using the checklist protocol. Below the videos, you’ll find step-by-step instructions with screenshots.
NatureCounts Checklist Protocol Walkthrough:
NatureCounts Checklist Tips and Tricks:
Checklist Basics
To begin your checklist survey, navigate to the Create tab in the app and select your location, then tap “Next”.
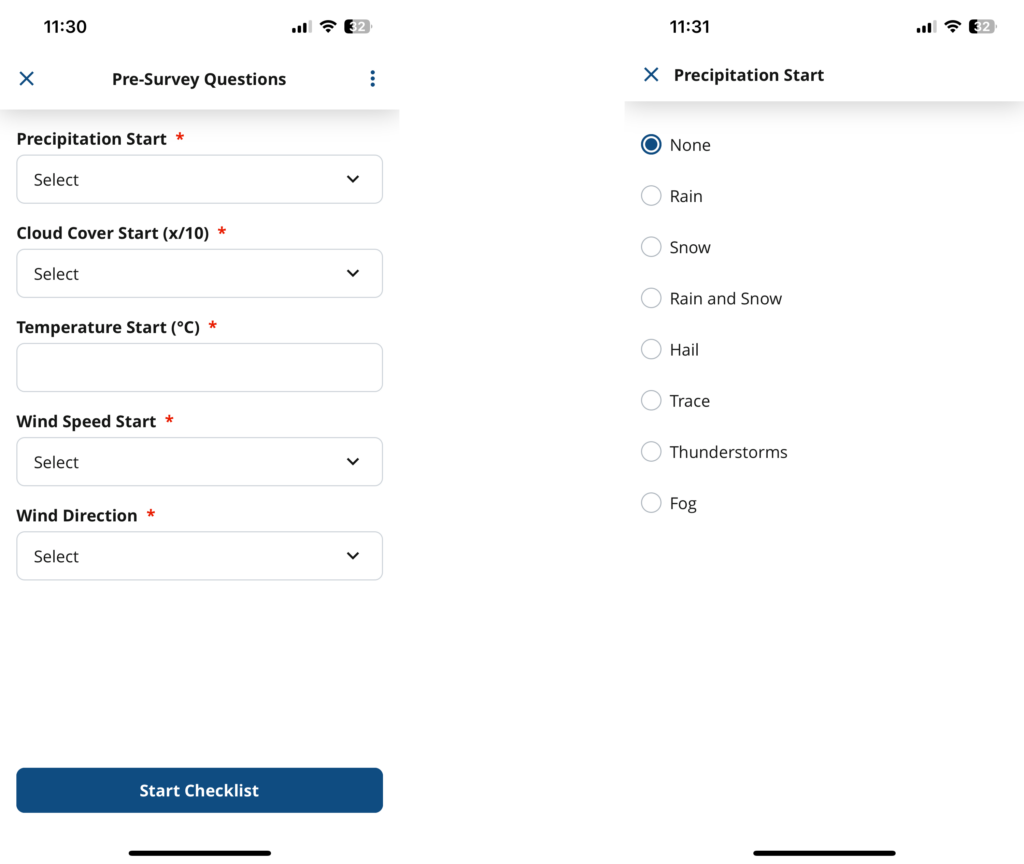
For some projects, you will need to answer some pre-survey questions. These are different for every project, and appear as a series of text boxes and dropdown menus. Red asterisks indicated fields that are required. Simply tap each box or menu, then enter or select the appropriate response. Tap “Start Checklist”.
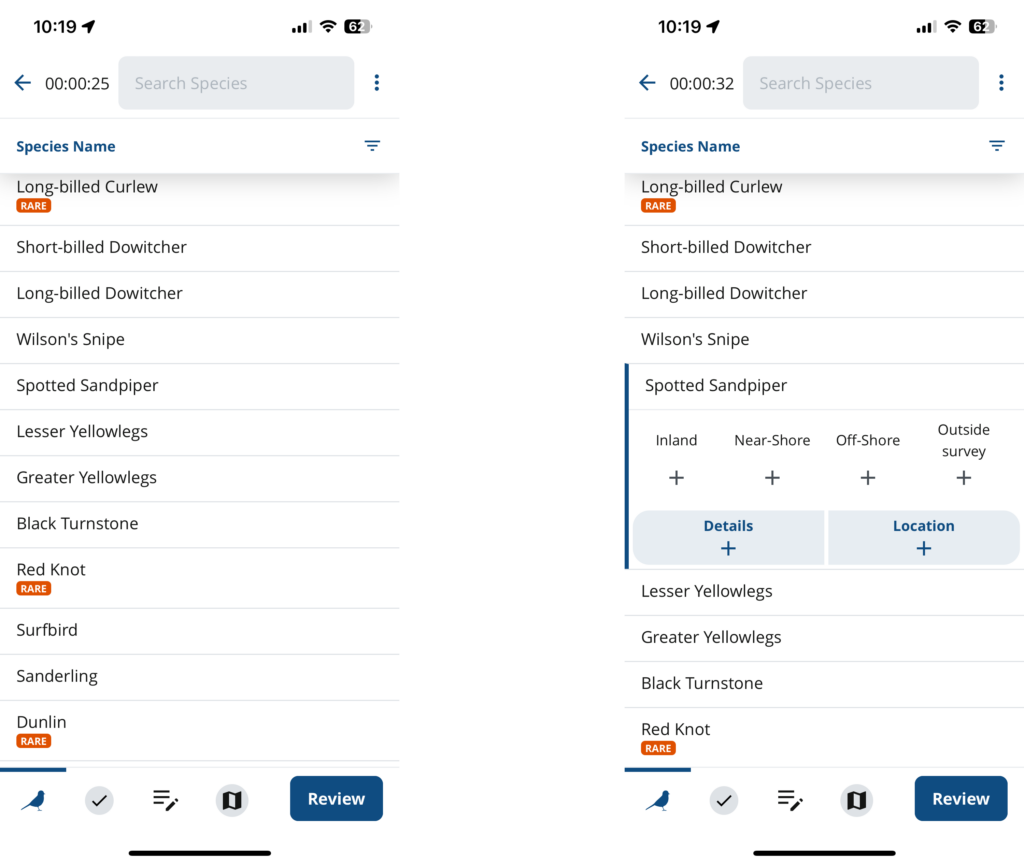
The checklist screen displays either a list of all expected birds in your region, or a list of all birds included in your protocol. On the right side you will see boxes in which you can enter numbers of individuals for each species. Depending on the project, you may also see boxes for information like breeding evidence, abbreviated “B.E.”. A timer in the upper left records the duration of your survey.

Note that for a few checklist protocols which collect more than two variables, you will not see data columns on the right. To enter data for these protocols, you will need to tap the species you have observed to expose the data entry boxes. Otherwise, data entry is the same for these protocols as for other checklists.
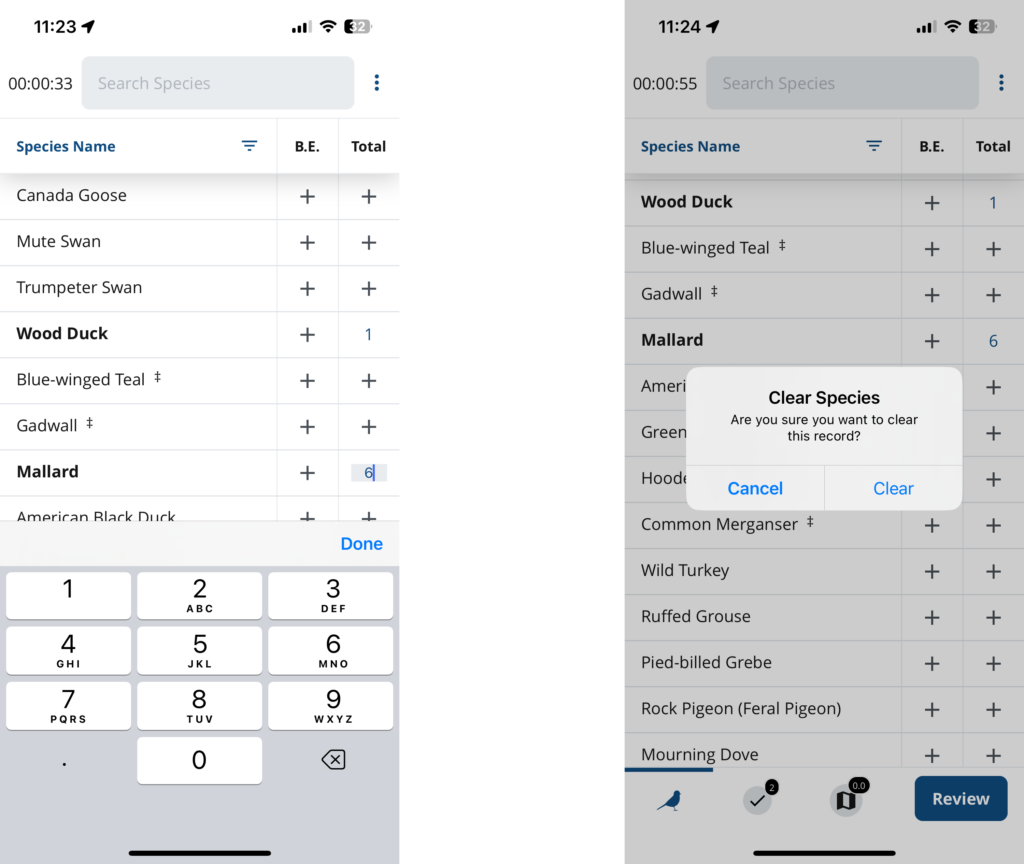
To enter one individual of a species, tap the “+” sign in the box beside that species. To enter multiple individuals at once, tap and hold the “+” sign until a number pad appears, then type the desired number.
To remove all individuals of a species, tap and hold the species name until you see a prompt to clear the species. To enter a species that is not on the list, search for it in the search box at the top.
Fast Data Entry
For users looking to enter data as quickly as possible, the app supports fast data entry. Fast data entry can feel a bit tricky at first, but some users find it a very efficient way of entering their data, especially when counting large numbers of common birds.
To use this feature, type the four-letter code for a species into the search bar, followed by a space, then the number you observed. If you observe more individuals, you can add more numbers separated by spaces. When you are ready to enter them into the checklist, tap the “+” symbol beside the species in the Total column. Each tap will add the next number in the sequence you entered in the search bar.
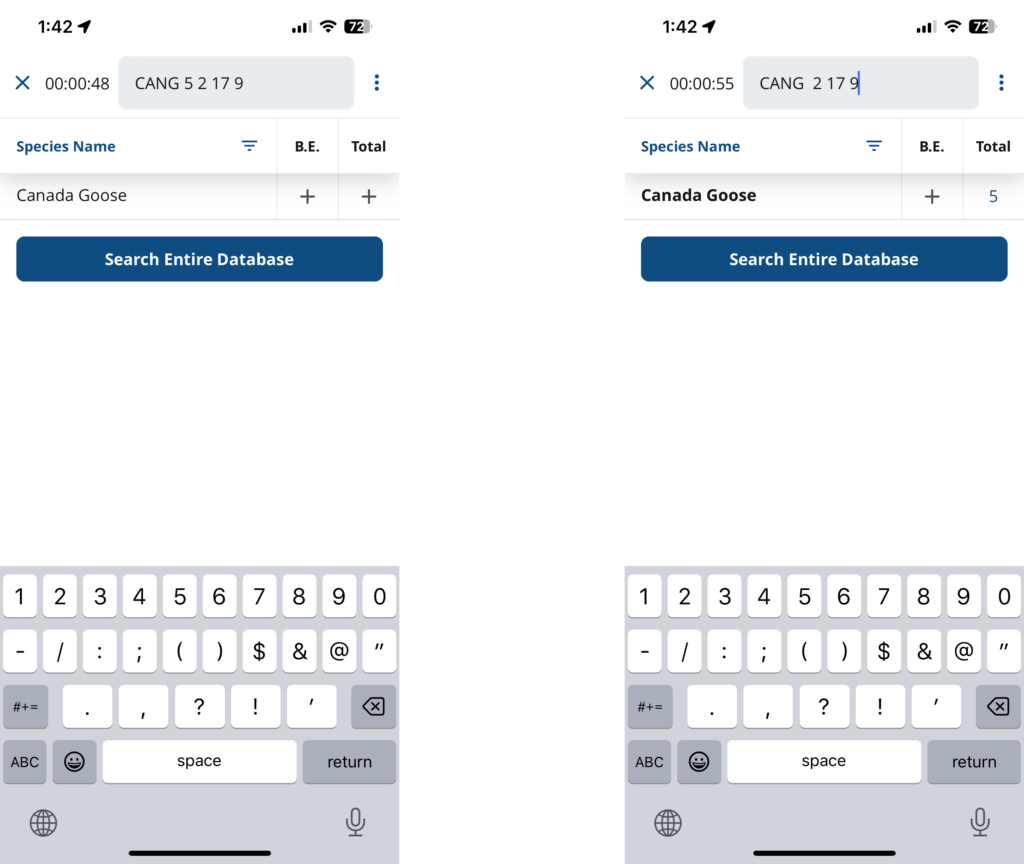
When you have finished entering numbers for that species, tap the “x” beside the search bar to return to the checklist.
Breeding Evidence & Additional Information
If your protocol includes breeding evidence, enter it by tapping the “+” sign in the box under B.E. The codes show as a grid by default, but you see a detailed list by tapping “List View” at the top. A banner at the top indicates whether you are within the breeding season for the selected species. Yellow highlights show when a code should be used with caution for a given species, and red highlights show when a code is not likely applicable. Codes which may not be used for the species are greyed out.
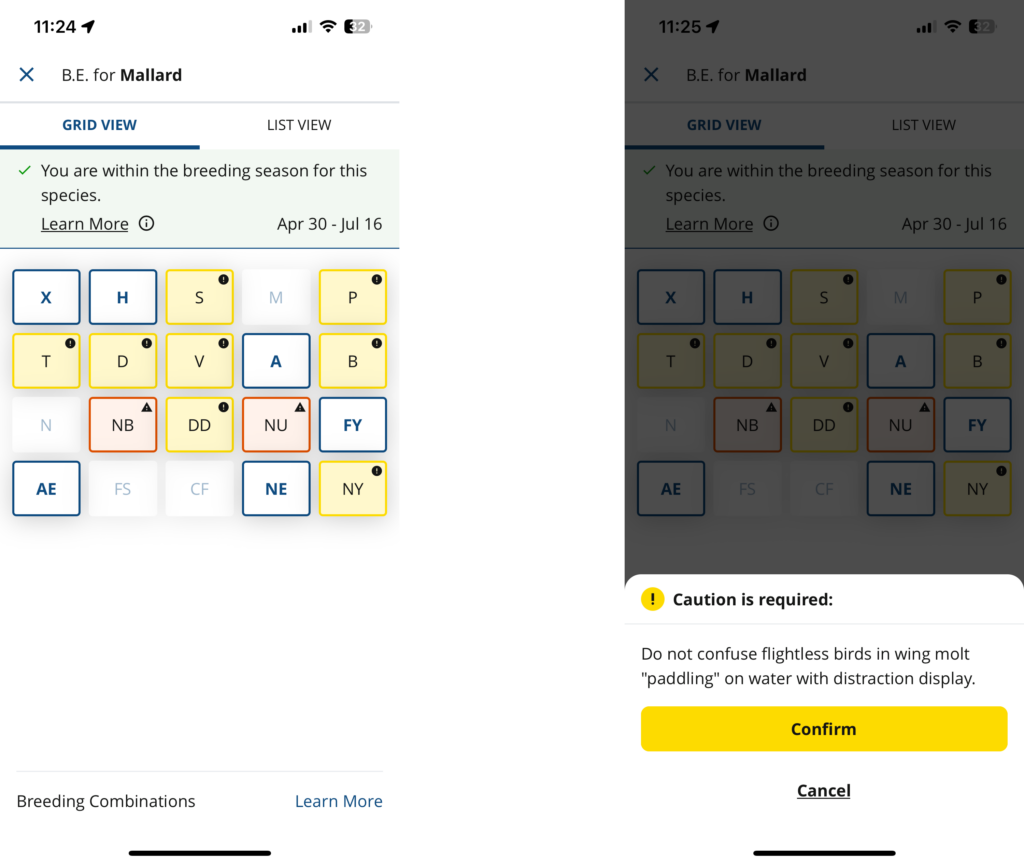
Tapping the desired breeding code will return you to your checklist.
If you want to enter additional information for a particular observation, tap the species name in the checklist. The “Details” box will allow you to type whatever details you feel are relevant. The “Location” box will allow you to tap on a map to record the specific location of a particular bird(s).
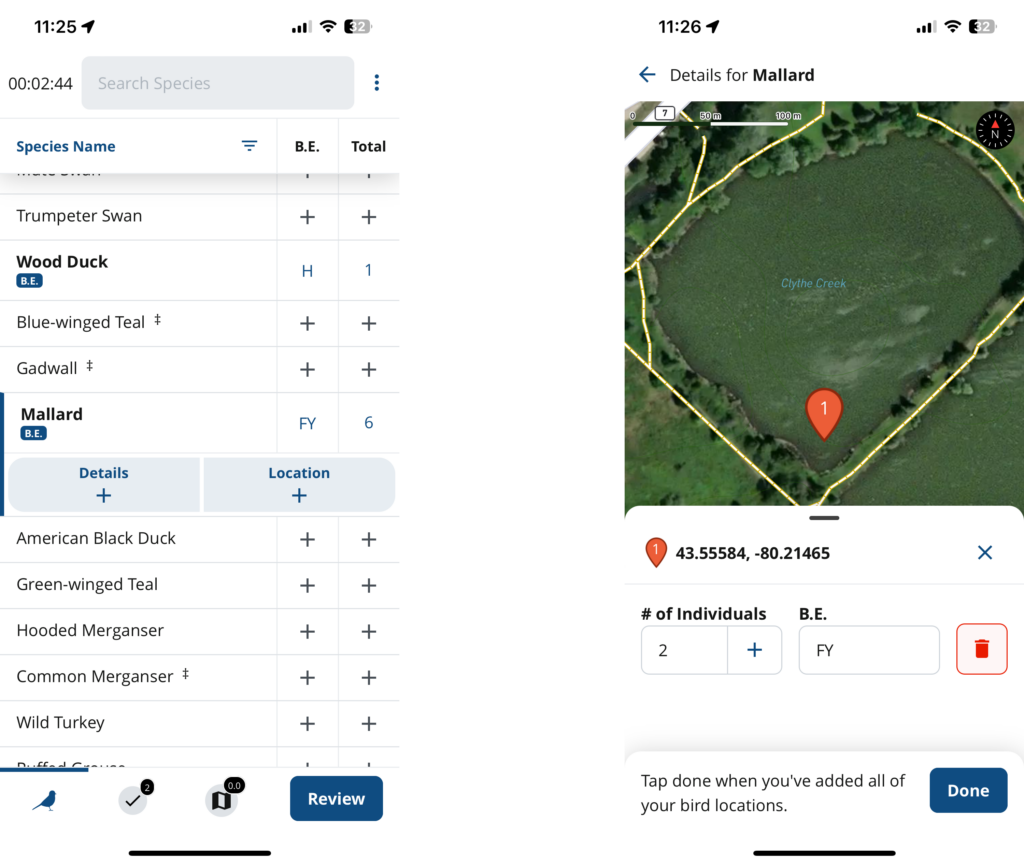
At any time while you are completing your checklist, you may view a list of only the birds you have observed by tapping the checkmark icon at the bottom of the screen. You may also view the map by tapping the map icon. When you have completed your checklist, tap “Review”.
Completing Your Survey
Some protocols include post-survey questions, which take the same format as the pre-survey questions. You will then be able to review your checklist. On the Checklist Review screen, confirm the date and time. In many cases the app automatically records the duration and distance of your survey, but if it doesn’t, you may enter them manually. Enter the number of observers, and indicate whether you are submitting a complete checklist.
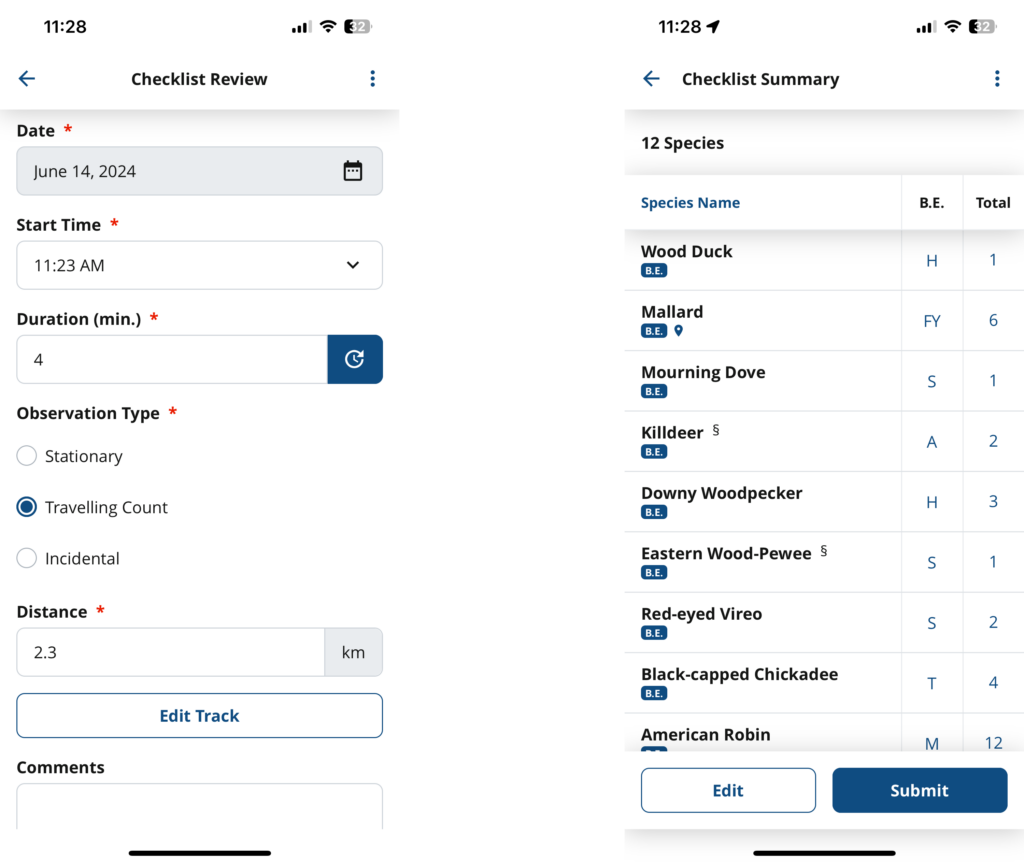
On the Checklist Summary screen, you may review the list of birds you observed. You can make changes to the list exactly as you did while initially completing the checklist. To return to the checklist screen, tap “Edit”. When you are satisfied, tap “Submit” to submit your checklist.
Remember that the exact details of your checklist survey will depend on the project in which you are participating, so don’t forget to check your project’s protocols and resources, and connect with your project coordinator if you have any questions!
Next section: Point Counts