Some projects collect detailed information on each individual bird that is encountered. Often these projects focus on specific species or groups of species, where relatively few birds are observed and each individual is treated as its own separate record. These projects sometimes use targeted survey methods like playing audio recordings. Individual surveys are used by projects like:
- Nocturnal Owl Surveys
- Canadian Nightjar Survey
- Some breeding bird atlas special surveys
This video will walk you through the process of collecting data using the individual survey protocol. Below the video, you’ll find step-by-step instructions with screenshots.
NatureCounts Individual Survey Protocol Walkthrough:
Individual Survey Basics:
To begin your individual survey, navigate to the Create tab in the app and select your location, then tap “Next”.
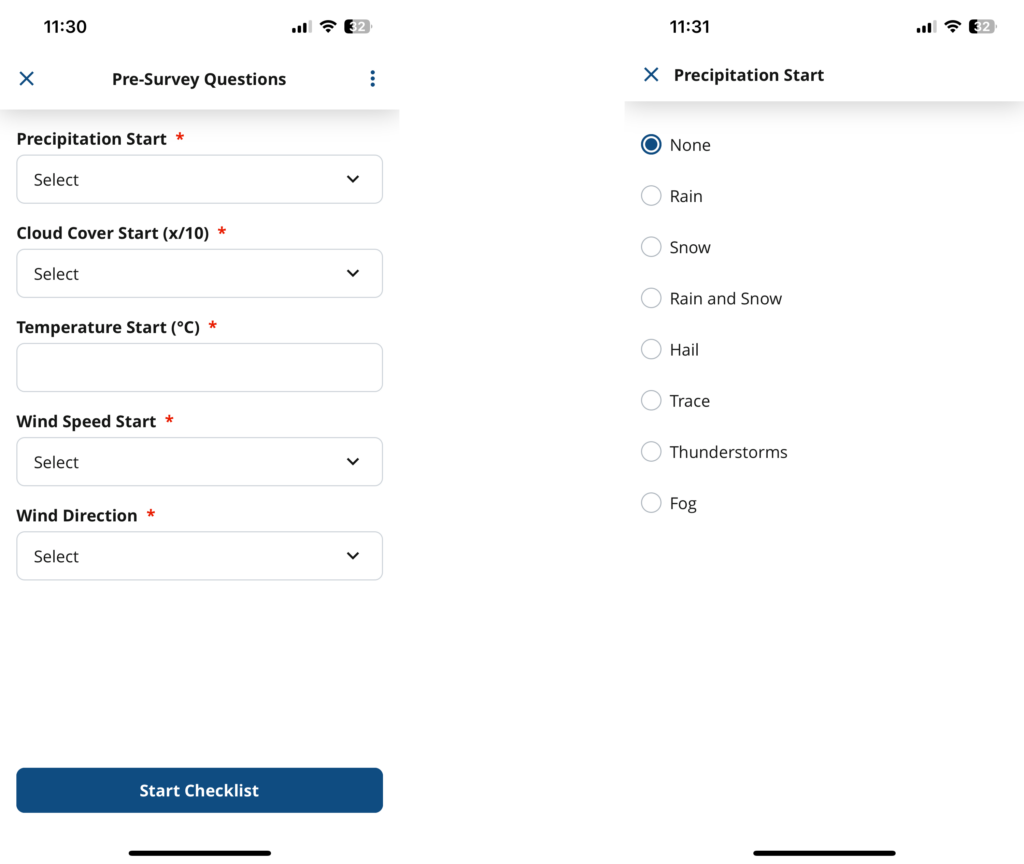
For most projects, you will need to answer some pre-survey questions. These are different for every project, and appear as a series of text boxes and dropdown menus. Red asterisks indicated fields which are required. Simply tap each box or menu, then enter or select the appropriate response. Tap “Start Checklist”.
The survey screen displays a list of all birds included in your protocol. Some protocols include a timer in the upper left, while many protocols that use audio recordings simply follow the timing of the recordings. To begin your survey, either tap the timer or start the recording. If you need to reset the timer, simply tap it again.
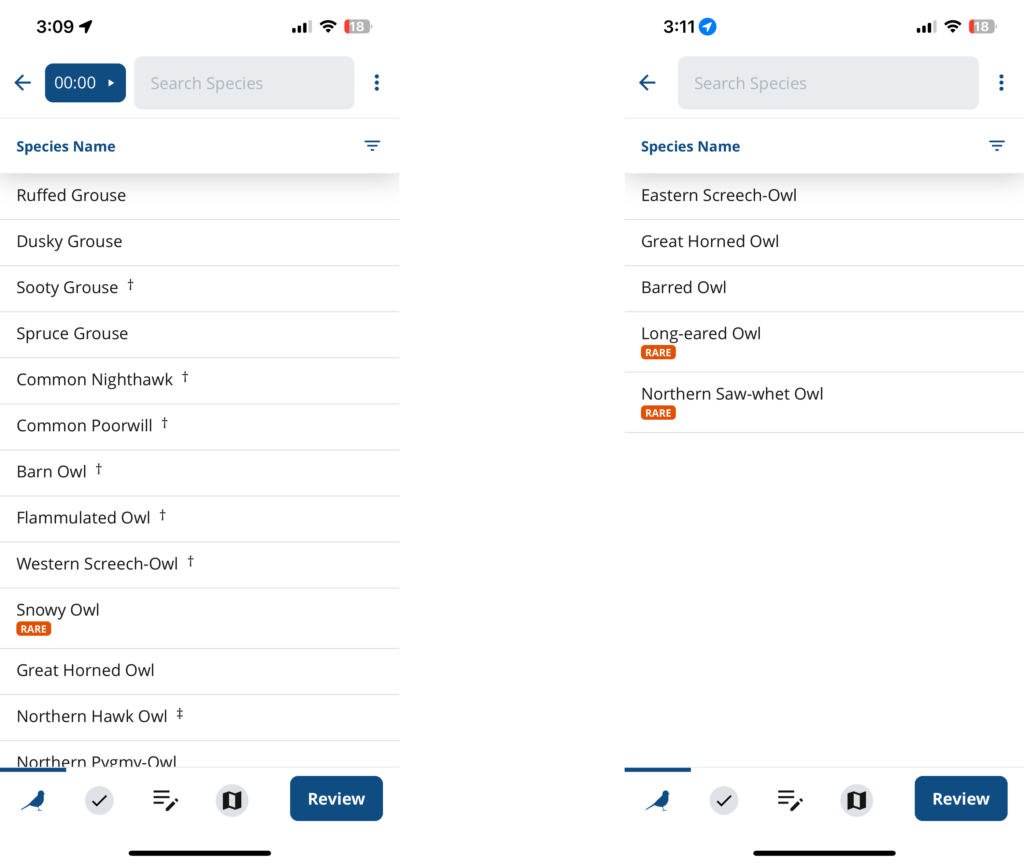
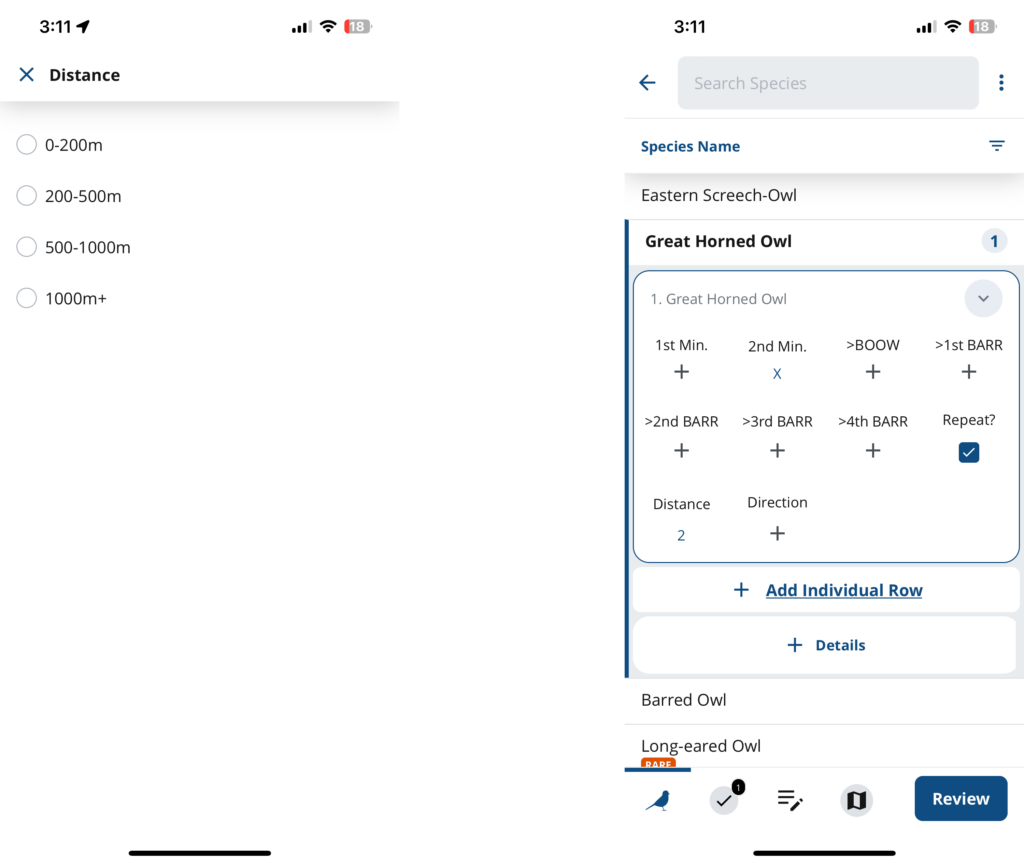
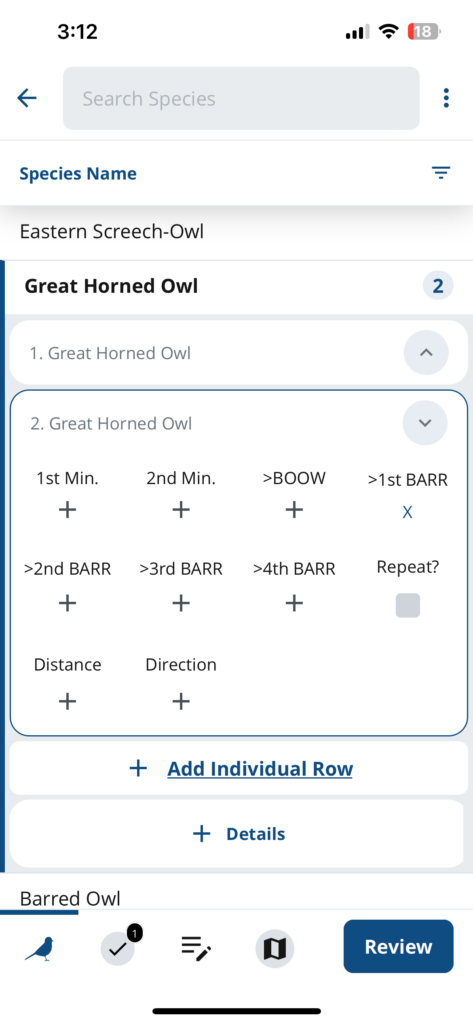
To enter an observation, tap the species you observed. This creates an observation box for the first individual. The information contained in the box varies by project, and may include the time interval in which you observed the bird, the distance or direction of the bird from the observer, behaviour, or other items. These projects are all different, so check your project’s protocols!
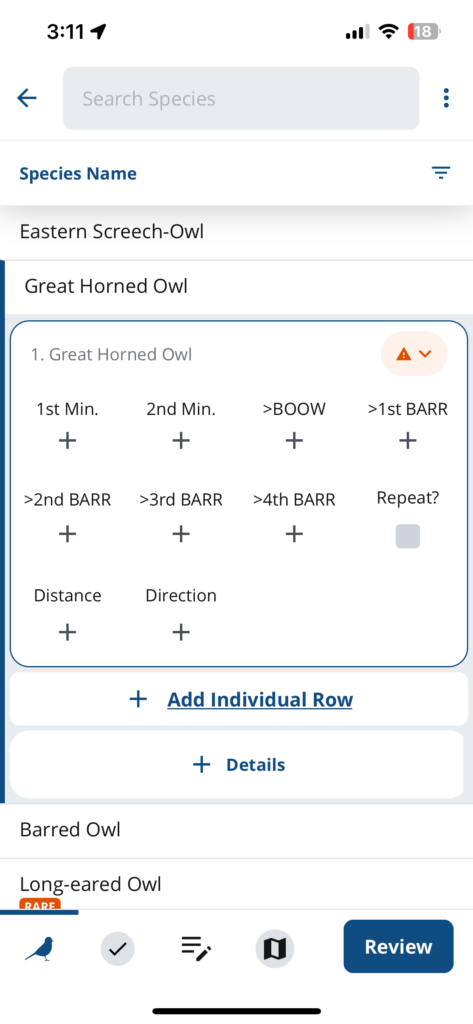
The options in the observation box have either a “+” sign or a checkbox. Tapping a “+” sign allows you to select from several options (for example, different distances). Tapping a checkbox simply adds or removes a checkmark from the box. In some projects, there are additional boxes under your observation for details or breeding evidence (abbreviated B.E.).
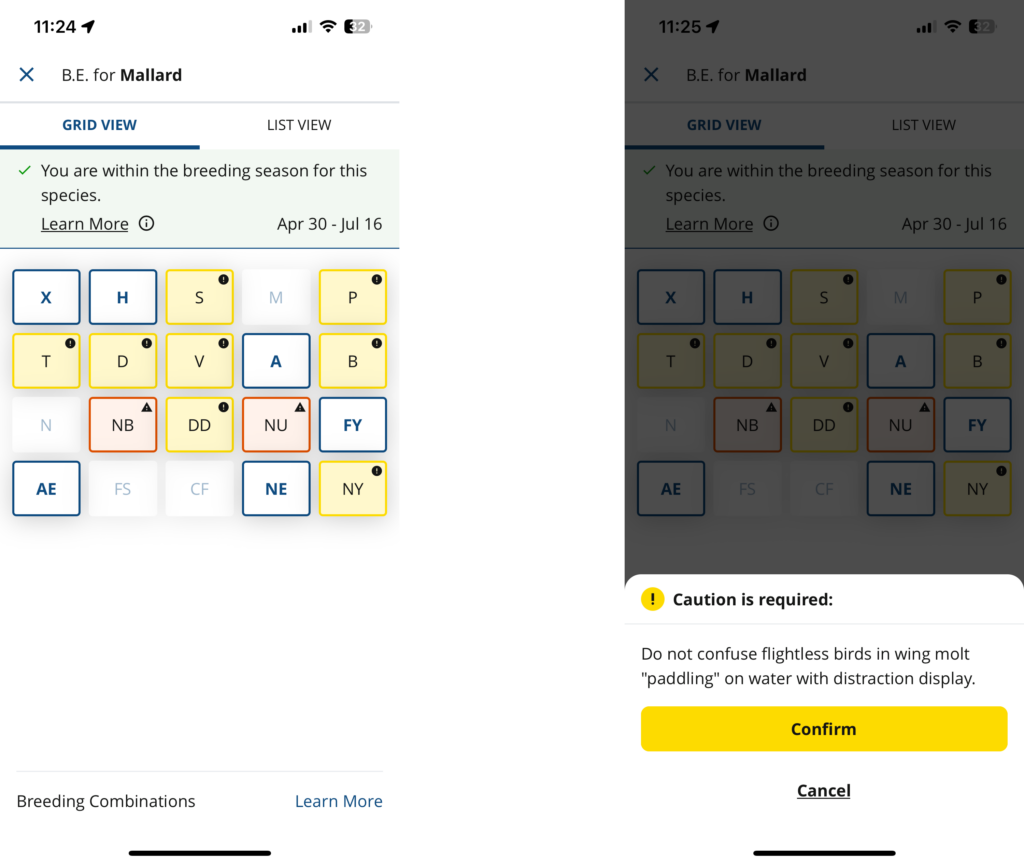
If your protocol includes breeding evidence, enter it by tapping the box labeled B.E. The codes show as a grid by default, but you see a detailed list by tapping “List View” at the top. A banner at the top indicates whether you are within the breeding season for the selected species. Yellow highlights show when a code should be used with caution for a given species, and red highlights show when a code is not likely applicable. Codes which may not be used for the species are greyed out.
It is important to remember that, in this type of survey, each observation is for a single individual. To add a second individual of the same species, tap “Add Individual Row” under your first observation. To enter an individual of a different species, tap the name of that species. Once you have completed your survey, tap “Review”.
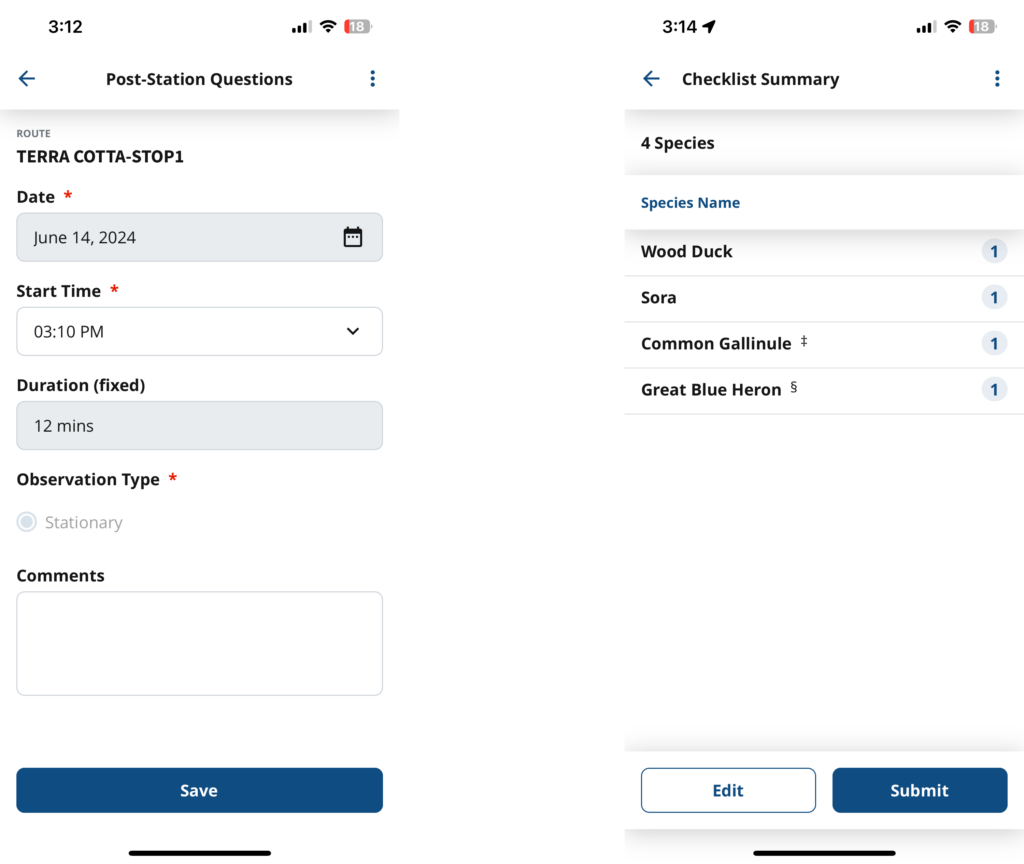
Some protocols include post-survey questions, which take the same format as the pre-survey questions. You will then be able to review your checklist. On the Checklist Review screen, confirm the date and time, and if prompted, enter the number of observers, and indicate whether you are submitting a complete checklist. In some projects, you will be able to review and edit your list before tapping “Submit”.
Remember that the exact details of your individual survey will depend on the project in which you are participating, so don’t forget to check your project’s protocols and resources, and connect with your project coordinator if you have any questions!